Dive into a world of chocolatey, cookie-crumbled bliss with this irresistible Oreo Fudge recipe! This no-bake dessert is incredibly easy to make, requiring minimal effort yet delivering maximum flavor. Imagine the rich, creamy texture of chocolate fudge perfectly complemented by the unmistakable crunch of Oreo cookies. This recipe isn’t just a dessert; it’s an experience – a delightful indulgence perfect for satisfying your sweet cravings any time of day. Whether you’re a seasoned baker or a kitchen novice, this Oreo Fudge recipe will become your go-to for quick, impressive treats. Get ready to impress your friends, family, or simply treat yourself to a well-deserved moment of pure deliciousness.
Why You’ll Love This Oreo Fudge Recipe
This Oreo Fudge recipe is a game-changer for several reasons. Firstly, it’s incredibly easy. No oven is required, making it perfect for hot summer days or when you simply don’t want to heat up your kitchen. The entire process is quick and straightforward, requiring minimal equipment and expertise. Secondly, it’s incredibly customizable. Want to add a sprinkle of sea salt for a sophisticated twist? Go for it! Prefer a different type of cookie? Experiment and find your perfect combination. The possibilities are endless! This versatility makes it a great recipe for both beginner bakers and seasoned pros looking for a quick and easy dessert. And thirdly, and perhaps most importantly, it tastes incredible! The combination of creamy chocolate fudge and crunchy Oreos is simply irresistible. This fudge is the perfect balance of sweet, rich, and crunchy – a symphony of textures and flavors that will leave you wanting more. It’s also incredibly versatile; it’s a perfect treat for potlucks, parties, or simply a delightful end to a long day. Try this recipe out and experience the simple joy of creating a delicious dessert that everyone will love.
Why You Should Try This Oreo Fudge Recipe
Beyond its ease and deliciousness, this Oreo Fudge recipe offers a few more compelling reasons to give it a try. It’s a fantastic way to use up leftover Oreo cookies – who doesn’t have a few crumbled ones lurking at the bottom of a bag? It’s also an excellent recipe for sharing. It’s easily portioned into small squares, perfect for handing out to friends or colleagues. This makes it ideal for potlucks, holidays, or any occasion where you want to bring a delightful treat. The rich chocolate and creamy texture make it an impressive dessert, easily surpassing store-bought options in both taste and quality. Plus, making your own Oreo Fudge gives you complete control over the ingredients, allowing you to avoid any unwanted additives or preservatives. And let’s be honest, the satisfaction of creating something delicious from scratch is unbeatable. This recipe allows you to craft a memorable experience, from the initial mixing to the final bite. It’s a perfect recipe to share with loved ones or enjoy alone – a little moment of delicious self-care.
Ingredients and Utensils for Perfect Oreo Fudge
This section details everything you’ll need to create the most amazing Oreo Fudge. We’ll cover the ingredients in detail, including potential substitutions, and highlight the essential tools for recipe success.
Ingredients: A Detailed Look
- 1 (14 ounce) package Oreo cookies: The star of the show! Make sure they’re fresh for the best flavor. You’ll need to crush these finely; a food processor works best but a zip-top bag and rolling pin is also effective. Reserve about 1/4 cup for topping for that extra crunch.
Secondary keywords: Oreo cookies, chocolate sandwich cookies - 1 (14 ounce) can sweetened condensed milk: This provides the fudge’s creamy base and sweetness. Ensure the can is well-shaken before use for a smooth consistency.
Secondary keywords: sweetened condensed milk, dairy product - 1 (12 ounce) package semi-sweet chocolate chips: Provides that rich chocolatey goodness. You can experiment with dark chocolate chips or milk chocolate chips to suit your preference. Using high-quality chocolate chips significantly impacts the taste.
Secondary keywords: semi-sweet chocolate chips, baking chocolate - 1/2 cup (1 stick) unsalted butter: Contributes to the creamy texture and richness of the fudge. Unsalted butter allows you to control the sweetness. Salted butter can be used, but you may want to reduce the amount of sugar used.
Secondary keywords: unsalted butter, dairy butter - 1 teaspoon vanilla extract: Enhances the overall flavor profile. A good quality vanilla extract adds depth and complexity.
Secondary keywords: vanilla extract, vanilla flavoring
Essential Utensils for Success
- 8×8 inch baking pan: This is the standard size for this recipe. A larger or smaller pan will change the final thickness of your fudge.
Secondary keywords: baking pan, square baking pan - Parchment paper: Lines the pan, preventing sticking and making removal a breeze. Leave an overhang for easy lifting.
Secondary keywords: parchment paper, baking paper - Double boiler or microwave-safe bowl: For melting the chocolate and butter. A double boiler prevents scorching, but a microwave is quicker. Stir frequently if microwaving to prevent burning.
Secondary keywords: double boiler, microwave-safe bowl - Spatula or wooden spoon: For stirring and mixing the ingredients. A sturdy spatula is ideal for spreading the fudge evenly in the pan.
Secondary keywords: spatula, wooden spoon - Food processor (optional but recommended): For creating finely crushed Oreo cookies. A zip-top bag and rolling pin also work, but a food processor provides the most consistent texture.
Secondary keywords: food processor, kitchen appliance - Measuring cups and spoons: Accurate measurements are crucial for a perfect outcome.
Secondary keywords: measuring cups, measuring spoons
Detailed Recipe Steps: Making the Perfect Oreo Fudge
Let’s dive into the step-by-step instructions to create this incredibly simple yet delicious Oreo Fudge. Each step is explained with tips and tricks to ensure perfect results.
- Prepare the pan: Line your 8×8 inch baking pan with parchment paper, ensuring the paper overhangs on two opposite sides. This is crucial for easy removal once the fudge has set. Tip: Lightly grease the pan before adding the parchment paper to provide an extra layer of security.
- Melt the chocolate and butter: Melt the chocolate chips and butter together. For a double boiler, fill a saucepan with about an inch of water, bring to a simmer, and place the chocolate and butter in a heatproof bowl set over the simmering water. Stir frequently until melted and smooth. For a microwave, melt in 30-second intervals, stirring vigorously between each interval to prevent burning. Tip: Avoid overheating the chocolate, as it can seize up and become grainy.
- Incorporate wet ingredients: Once the chocolate and butter are completely melted and smooth, stir in the sweetened condensed milk and vanilla extract. Mix thoroughly until everything is well combined and the mixture is smooth and creamy. Tip: Ensure the sweetened condensed milk is well-mixed before adding it to the chocolate mixture for a consistent texture.
- Add the crushed Oreos: Gently fold in the finely crushed Oreos, making sure they’re evenly distributed throughout the chocolate mixture. Avoid overmixing to prevent the Oreos from becoming too mushy. Tip: Leave some larger pieces of Oreos for added texture and visual appeal.
- Pour and spread: Pour the mixture into the prepared baking pan and spread it evenly using a spatula or the back of a spoon. Tip: A straight edge helps create a perfectly level top.
- Sprinkle the topping: Sprinkle the reserved crushed Oreos over the top of the fudge. This adds a delightful crunch. Tip: Press down gently on the topping to help it adhere to the fudge.
- Chill and set: Refrigerate the fudge for at least 4 hours, or preferably overnight, to allow it to set completely. The longer it chills, the firmer the fudge will become. Tip: Avoid freezing, as this can alter the texture.
- Cut and serve: Once the fudge is fully set, lift it out of the pan using the parchment paper overhang. Cut into squares and serve. Tip: Use a sharp knife for clean cuts and wipe the blade after each cut to prevent sticking.
Tips and Variations for Your Oreo Fudge
This section explores creative variations and helpful advice to avoid common mistakes.
Ingredient Alternatives
- Cookie variations: Experiment with other cookies like chocolate chip cookies, digestive biscuits, or even graham crackers for a unique twist. Check out this recipe for Peppermint Chocolate Chip Cookies for some inspiration.
- Chocolate variations: Try different types of chocolate chips, like dark chocolate, milk chocolate, or even white chocolate for a different flavor profile.
- Adding mix-ins: Incorporate other ingredients like chopped nuts, pretzels, or even dried fruit for added texture and flavor.
- Vegan adaptation: Substitute the butter with vegan butter and the milk with a full-fat canned coconut milk for a vegan Oreo Fudge. Ensure your chocolate chips are vegan-friendly.
- Gluten-free adaptation: Use gluten-free Oreo cookies or a gluten-free cookie alternative.
Avoiding Common Mistakes
- Overheating the chocolate: This can cause the chocolate to seize up. Melt slowly and gently, stirring constantly.
- Overmixing the fudge: Overmixing can create a tough texture. Mix just until the ingredients are combined.
- Not chilling long enough: Insufficient chilling time will result in a soft and messy fudge.
- Using a dull knife: Use a sharp knife for clean cuts to avoid crumbling.
Nutritional Values and Health Benefits of Oreo Fudge
While Oreo Fudge is undeniably indulgent, let’s briefly examine its nutritional aspects.
Note: Nutritional values are approximate and will vary based on specific brands and ingredients used. This is a treat and should be enjoyed in moderation.
A typical serving (approximately 1 square) likely contains:
- Calories: Approximately 150-200
- Protein: Approximately 2-3 grams
- Fat: Approximately 10-15 grams
- Carbohydrates: Approximately 20-25 grams
Benefits of Ingredients: The butter provides fat-soluble vitamins, while the chocolate offers antioxidants (especially in darker varieties). The Oreo cookies, while processed, contain some vitamins and minerals from the ingredients used in their production. However, it’s important to remember that this is a treat, and its primary benefit lies in its deliciousness and enjoyment. Moderation is key.
FAQs
How long does Oreo Fudge last?
Can I freeze Oreo Fudge?
What can I substitute for sweetened condensed milk in Oreo Fudge?
Is this Oreo Fudge recipe gluten-free?
Can I make this Oreo Fudge ahead of time?
Conclusion: Indulge in the Perfect Oreo Fudge
This Oreo Fudge recipe is a testament to the fact that simple recipes can be incredibly rewarding. Its ease of preparation, delicious taste, and endless customization options make it a perfect dessert for any occasion. Whether you’re a seasoned baker or a complete beginner, you’ll find this recipe surprisingly straightforward and utterly satisfying. Remember to share your experience in the comments below! Don’t forget to share this recipe with your friends and family, and most importantly, enjoy every bite of this decadent treat! For more delicious dessert recipes, check out our other posts on Recipesamaya.com! And for even more inspiration, check out our Pinterest board here.
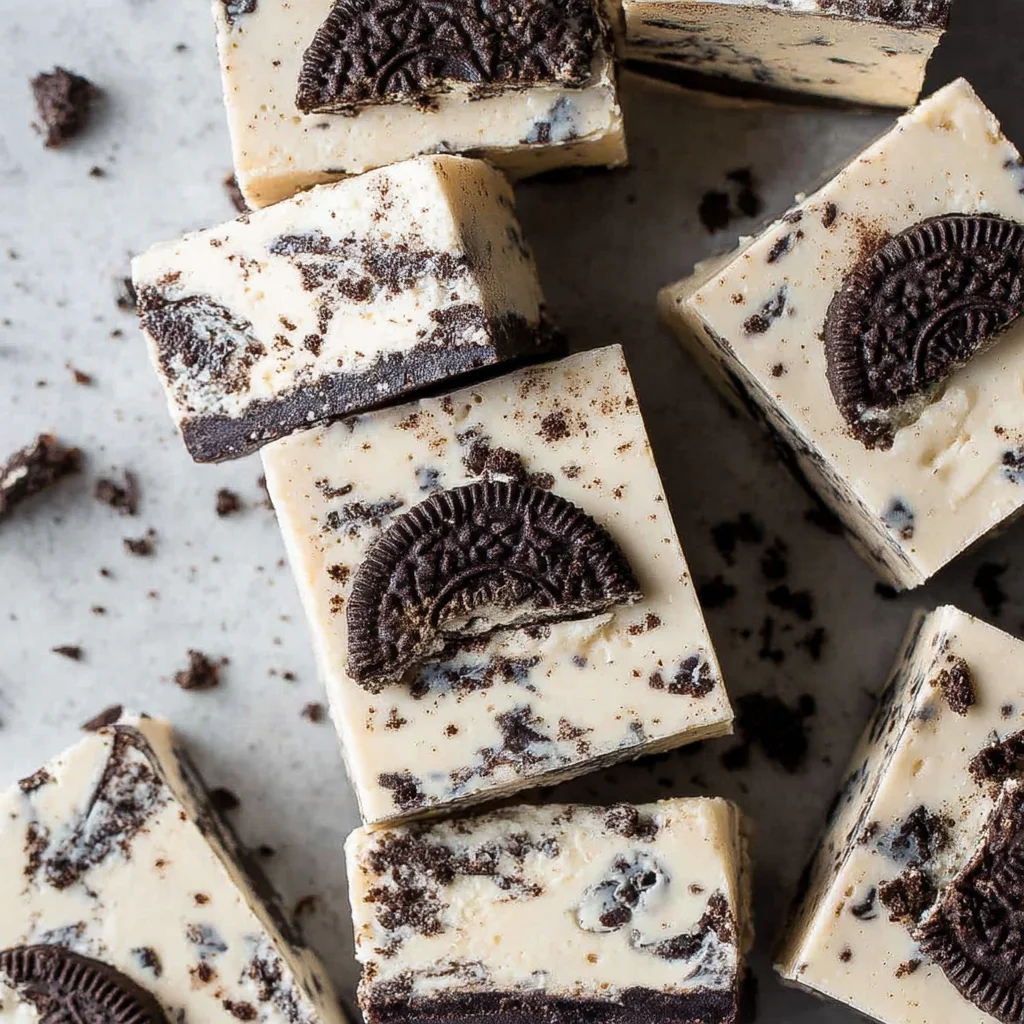
Decadent Oreo Fudge
Ingredients
Equipment
Method
- Line an 8x8 inch baking pan with parchment paper, leaving an overhang on two sides for easy removal.
- Crush Oreo cookies finely. Reserve about 1/4 cup for topping.
- Melt butter and chocolate chips together in a double boiler or microwave-safe bowl in 30-second intervals, stirring until smooth. If using a microwave, stir frequently to prevent burning.
- Stir in sweetened condensed milk and vanilla extract until well combined.
- Add crushed Oreos and stir until evenly distributed.
- Pour the mixture into the prepared baking pan and spread evenly. Sprinkle reserved crushed Oreos and sea salt (optional) over the top.
- Refrigerate for at least 4 hours, or preferably overnight, to allow the fudge to set completely.
- Lift the fudge out of the pan using the parchment paper overhang. Cut into squares and serve.