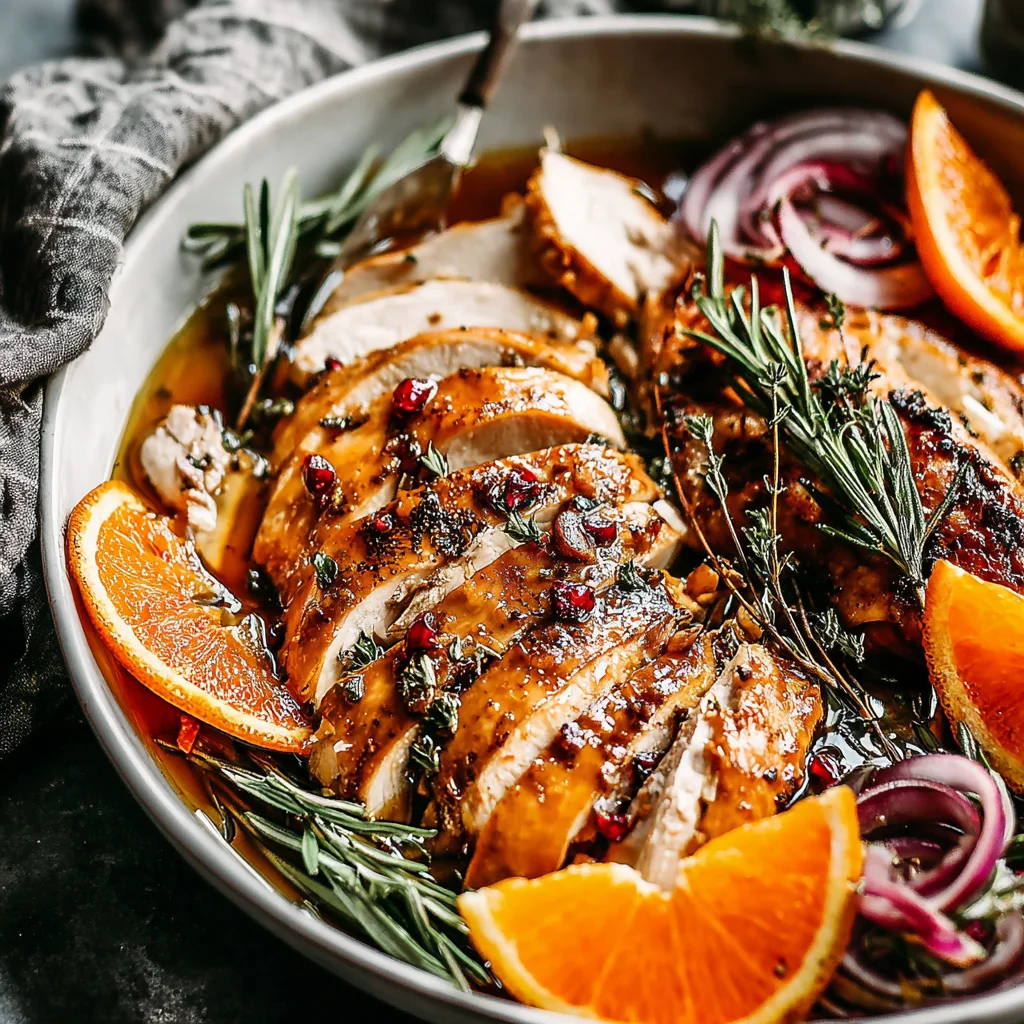
Thanksgiving is just around the corner, and the star of the show, the turkey, is calling for your attention! But let’s be honest, dry, bland turkey is a Thanksgiving tragedy. This year, let’s avoid that disaster and unlock the secret to unbelievably juicy, flavorful, and tender turkey: a long and easy turkey brine. This comprehensive guide will walk you through creating the perfect turkey brine, transforming your holiday bird from ordinary to extraordinary. Prepare to impress your family and friends with a turkey so delicious, they’ll be asking for seconds (and maybe thirds!). Forget the dry, disappointing turkey of years past – this is the year your turkey steals the show!
Why You’ll Love This Easy & Long Turkey Brine Recipe
This isn’t your average, quick-dip brine. We’re talking about a long, slow, flavorful soak that deeply infuses your turkey with moisture and deliciousness. Forget battling dry breast meat – this brine penetrates the thickest parts of the bird, resulting in a consistently moist and tender experience from edge to edge. The flavor? Absolutely incredible. The simple yet powerful combination of salt, sugar, and aromatics creates a complex depth of flavor that elevates your turkey beyond anything you’ve tasted before. This brine is incredibly easy to prepare, requiring minimal effort for maximum results. Simply combine the ingredients, submerge your turkey, and relax – the brine does all the work!
Beyond the incredible taste and texture, this recipe offers unmatched convenience. You can prepare the brine well in advance, allowing you to focus on other Thanksgiving preparations without worrying about the turkey. The extended brining time also means less hands-on cooking time on Thanksgiving Day itself. You can simply roast your brined turkey with confidence, knowing it will be perfectly cooked and unbelievably moist. This long brine method is a game changer for busy cooks and anyone who wants to enjoy a stress-free Thanksgiving, with the ultimate reward of the most succulent, flavorful turkey imaginable. It’s a recipe that pays off in delicious dividends – making this Thanksgiving one to remember for all the right reasons. Imagine the compliments, the happy faces, and the satisfying feeling of achieving culinary perfection! For the ultimate festive touch, serve your masterpiece alongside our delicious Turkey Veggie Tray.
Why You Should Try This Turkey Brine Recipe
Let’s face it, a dry turkey can ruin Thanksgiving. This recipe is your insurance policy against that culinary catastrophe. The extended brining time ensures your turkey is not only incredibly moist, but also deeply flavorful. The combination of kosher salt and sugars draws moisture into the meat, while the aromatics – peppercorns, bay leaves, rosemary, thyme, onion, garlic, and orange – infuse the turkey with complex and delicious notes. This recipe also improves the bird’s overall texture. The resulting turkey is not only juicy but also remarkably tender, making it easy to carve and serve. The long brine method ensures even flavor and moisture distribution throughout the entire bird. Even those often-dry breast portions will be succulent and delicious, delighting every guest at your table. For a deliciously cozy end to your Thanksgiving feast, try our Slow Cooker Hot Chocolate recipe.
Beyond the superior taste and texture, this turkey brine recipe offers practicality and convenience. The brine can be prepared ahead of time, freeing you to focus on other tasks. The brining process happens passively, requiring minimal active involvement from you. This is incredibly useful for busy individuals or those with limited kitchen time. Preparing a delicious Thanksgiving meal can be stressful, but this brine recipe removes a significant source of stress, allowing you to focus on other preparations and enjoy the day. This method gives you ultimate control over the flavor and texture of your turkey, ensuring a perfect result every time. You can effortlessly achieve professional-quality results at home, impressing your guests with a turkey they won’t soon forget. The long brine method minimizes the risk of a dry turkey, guaranteeing a memorable, juicy, and flavorful Thanksgiving feast.
Ingredients and Necessary Utensils for Your Turkey Brine
- Main Ingredients:
- 1 gallon (128 ounces) cold water: Use filtered water for the best flavor. The water temperature is crucial; cold water prevents the turkey from cooking prematurely in the brine.
- 1 cup kosher salt (Do NOT use table salt): Kosher salt dissolves more easily and has a less intense salty flavor than table salt, resulting in a more evenly seasoned turkey. Using table salt can lead to an overly salty bird.
- ½ cup brown sugar, packed: Brown sugar adds a touch of caramel sweetness and depth of flavor, balancing the saltiness and enhancing the overall taste.
- ¼ cup granulated sugar: Granulated sugar contributes to the sweetness and also helps to draw moisture into the turkey meat.
- 2 tablespoons black peppercorns: Whole peppercorns release their flavor gradually, infusing the turkey with a subtle spice without overpowering the other flavors. Crushed peppercorns release their flavor much quicker.
- 4 bay leaves: Bay leaves add a subtle herbal, slightly earthy note that complements the other spices beautifully.
- Aromatic Ingredients:
- 2 large sprigs fresh rosemary: Rosemary brings a fragrant, piney flavor that works exceptionally well with turkey.
- 2 large sprigs fresh thyme: Thyme provides a delicate herbal flavor and complements the rosemary beautifully.
- 1 large onion, quartered: Onion adds a savory depth and sweetness to the brine.
- 4 cloves garlic, smashed: Smashed garlic infuses a pungent, savory flavor into the brine. Don’t mince the garlic; smashing it helps release the flavor more effectively.
- 1 orange, zested and juiced: Orange zest adds a bright citrusy note, while the juice increases the brine’s moisture content.
- Essential Utensils:
- Large stockpot or food-grade bucket: Choose a container large enough to comfortably hold your turkey and the brine solution. A food-grade bucket is ideal if you don’t have a large enough stockpot.
- Large zip-top freezer bags (or a brining bag): These are essential for submerging the turkey in the brine. Make sure the bags are large enough and heavy-duty enough to hold the weight of the turkey without tearing. If you opt for zip-top bags, double-bag them for added safety.
- Measuring cups and spoons: Accurate measurements are important for the brine’s success.
- Large spoon or ladle: Use this to stir the brine and ensure all ingredients are well combined. You will also use this to help submerge the turkey in the brining bag.
- Meat thermometer: This is crucial for ensuring your turkey reaches a safe internal temperature during cooking.
- Roasting pan: To roast the turkey in after brining.
Detailed Steps for Making Your Turkey Brine
- Prepare the Brine Solution: In your large stockpot or food-grade bucket, combine the cold water, kosher salt, brown sugar, and granulated sugar. Stir vigorously until the salt and sugars are completely dissolved. This is essential for even flavor distribution.
- Add the Aromatics: Add the black peppercorns, bay leaves, rosemary sprigs, thyme sprigs, quartered onion, smashed garlic cloves, orange zest, and orange juice to the brine solution. Stir gently to combine.
- Prepare the Turkey: Rinse your turkey thoroughly inside and out. Pat it dry with paper towels. **Removing excess moisture from the turkey’s surface helps the brine penetrate more effectively.**
- Brine the Turkey: Place the turkey in a large zip-top freezer bag or brining bag. Carefully pour the brine solution over the turkey, ensuring it’s completely submerged. **If using zip-top bags, double bag the turkey for added security.** Seal the bag tightly, removing as much air as possible.
- Refrigerate: Place the bagged turkey in a large container (like a roasting pan) to prevent leaks. Refrigerate for 12-24 hours. **The longer you brine (within the 24-hour limit), the more flavorful and moist your turkey will be.**
- Remove from Brine: After 12-24 hours, remove the turkey from the brine. **Discard the brine**; do not reuse it. Rinse the turkey thoroughly under cold running water. Pat it dry again with paper towels. This step is crucial to remove excess salt and prevent a salty turkey.
- Roast the Turkey: Preheat your oven according to your preferred roasting method. Place the turkey in a roasting pan and roast until it reaches a safe internal temperature of 165°F (74°C) in the thickest part of the thigh. Use a meat thermometer to ensure accurate cooking. Remember to follow your chosen recipe’s roasting instructions for optimal results.
Tips and Variations for Your Turkey Brine
For a richer, more complex brine, consider adding other aromatics such as juniper berries, star anise, or even a few whole cloves. Feel free to experiment with different citrus fruits, like lemons or grapefruits. If you are short on fresh herbs, you can use dried herbs instead. However, remember to reduce the amount by approximately one-third. A good rule of thumb is to use 1 teaspoon of dried herbs for every tablespoon of fresh herbs. Experimenting is part of the fun!
Avoiding Common Mistakes: The most common mistake is using table salt instead of kosher salt. Table salt is much more concentrated and can easily make your turkey too salty. Always use kosher salt, and never exceed the specified amount. Another common mistake is not allowing sufficient time for brining. While a shorter brine is better than none, the ideal brining time is at least 12 hours. For an incredibly juicy turkey, aim for 24 hours.
Gluten-Free Brine: This recipe is naturally gluten-free, so no adjustments are needed.
Vegan Brine (for a Tofurky or other plant-based roast): While this brine is not designed for vegan roasts, it can be easily adapted. Omit the honey and replace the sugar with maple syrup or agave nectar. Adjust the amount of herbs and spices according to your preferences. Consider adding a tablespoon of liquid smoke for added depth. This is a great place to get creative and experiment!
Nutritional Values and Benefits of a Turkey Brine
While the exact nutritional values depend on the specific ingredients and their quantities, a turkey brine generally contributes to a healthier and more flavorful turkey. Here’s a look at the individual components and their benefits:
- Salt (Kosher): Provides essential electrolytes and enhances flavor. Note: Excessive salt intake can be harmful, so it’s crucial to stick to the recipe’s guidelines.
- Sugar (Brown & Granulated): Adds sweetness and helps tenderize the turkey meat while retaining moisture. Opt for natural sugars like maple syrup or agave for healthier variations.
- Herbs & Spices (Rosemary, Thyme, Bay Leaf, Peppercorns, Garlic, Onion): Offer a rich array of antioxidants and flavors. These contribute to the overall health benefits of the herbs and spices while enhancing the turkey’s taste profile. They are low in calories and fat while adding significant flavor.
- Orange: Provides Vitamin C and adds a refreshing, bright flavor to the brine.
The brine doesn’t significantly alter the turkey’s nutritional profile, but it significantly impacts its flavor, texture, and moisture, making it more enjoyable and potentially improving digestibility. The added moisture helps you use less oil or butter while roasting, resulting in a healthier final product. The herbs and spices in the brine contribute to an overall more flavorful and healthier culinary experience.
FAQs about Turkey Brine
Can I brine my turkey overnight?
What kind of salt should I use for turkey brine?
Can I reuse the brine?
What happens if I over-brine my turkey?
Can I brine a smaller or larger turkey?
Conclusion: Your Thanksgiving Turkey Just Got an Upgrade!
This easy and long turkey brine recipe is your secret weapon for a Thanksgiving turkey that’s unbelievably juicy, flavorful, and tender. By following these simple steps, you’ll transform your holiday bird from ordinary to extraordinary, impressing your family and friends with a culinary masterpiece. Don’t settle for a dry, disappointing turkey – give this recipe a try and experience the difference a long brine can make. Remember to share your delicious results with us in the comments below, and don’t forget to share this recipe with your friends and family! For more delicious holiday treats, check out our Cream Cheese Mints recipe.
Happy Thanksgiving, and happy cooking! And for more amazing recipe ideas, be sure to follow my Pinterest board: Recipesamaya Blog Pinterest
Easy & Long Turkey Brine for a Juicy Bird
Ingredients
Equipment
Method
- In a large stockpot, combine cold water, kosher salt, brown sugar, granulated sugar, peppercorns, bay leaves, rosemary, thyme, onion, garlic, and orange zest and juice. Stir until salt and sugars are dissolved.
- Submerge the turkey completely in the brine. If using a stockpot, ensure the turkey is fully covered; otherwise, use a brining bag.
- Refrigerate for 12-24 hours. The longer it brines, the more flavorful and moist your turkey will be.
- Remove the turkey from the brine and rinse thoroughly under cold water.
- Pat the turkey dry with paper towels.
- Roast the turkey according to your preferred method and recipe.
- Let the turkey rest for at least 20 minutes before carving.