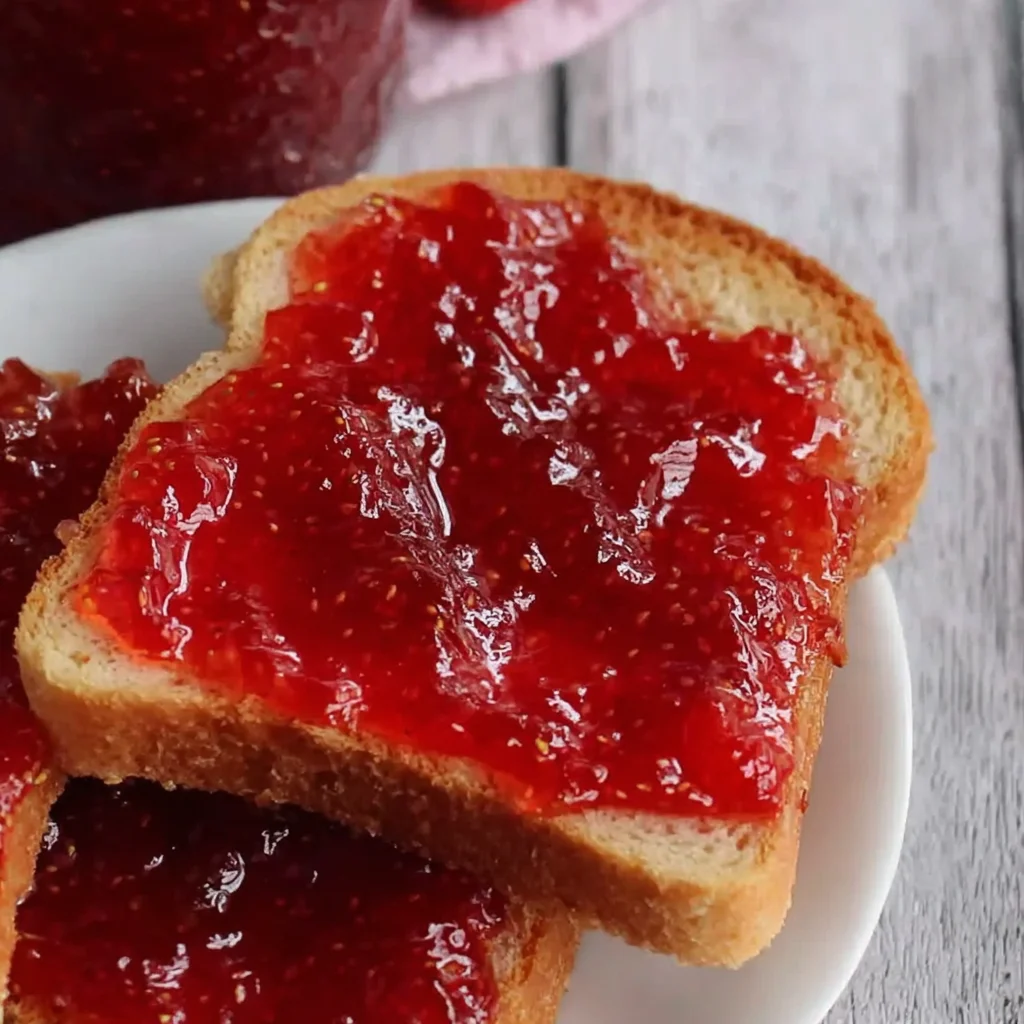
Summer’s bounty is at its peak when juicy, ripe strawberries are abundant. And what better way to preserve this deliciousness than by making your own homemade strawberry jam? This Homemade Strawberry Jam Recipe is a delightful journey into the world of homemade preserves, a perfect blend of sweet and tangy flavors that will transport you to sun-drenched strawberry fields. Forget store-bought jams, filled with artificial ingredients and lacking that burst of fresh strawberry goodness. This recipe guarantees a truly authentic, homemade taste that will impress your friends and family, and make your kitchen smell heavenly. Imagine spreading a spoonful of this vibrant jam onto warm biscuits, pairing it with creamy yogurt, or using it as a delightful filling for your favorite pastries. Let’s dive into this simple yet rewarding recipe that will become a cherished tradition in your kitchen.
Why You’ll Love This Homemade Strawberry Jam Recipe
This Homemade Strawberry Jam Recipe is more than just a recipe; it’s an experience. It’s the satisfying aroma of simmering strawberries filling your kitchen, the joy of transforming fresh fruit into a delicious preserve, and the pride of creating something truly special. Beyond the sensory experience, there are several compelling reasons why you’ll absolutely adore this recipe:
- Unmatched Freshness: Using fresh, ripe strawberries ensures an unparalleled taste. Store-bought jams often pale in comparison to the vibrant flavor of homemade jam made with peak-season fruit.
- Control over Ingredients: You have complete control over the ingredients, ensuring no artificial colors, flavors, or preservatives find their way into your jam. You know exactly what you’re putting in your body – and it’s pure goodness!
- Customization Options: While this recipe is delicious as is, it provides a foundation for endless customization. Feel free to experiment with different levels of sweetness, add spices, or incorporate other fruits for a unique twist. Explore more recipe ideas on our site.
- Cost-Effective: While the initial investment in ingredients might seem comparable to buying jars of jam, the yield from this recipe is significantly greater. Making your own jam can save you money in the long run.
- Perfect Gift: Homemade strawberry jam makes an exquisite and thoughtful gift for friends and family. It’s a personal touch that shows you care and adds a delightful homemade element to any occasion.
- Preservation of Summer Flavors: Capture the essence of summer and enjoy the vibrant taste of fresh strawberries long after the season is over. This Homemade Strawberry Jam Recipe is a wonderful way to preserve the flavors of summer.
Why You Should Try This Homemade Strawberry Jam Recipe
In a world of readily available processed foods, making your own jam is a rewarding experience that connects you with the simple pleasures of cooking and the satisfaction of creating something delicious from scratch. This Homemade Strawberry Jam Recipe offers a multitude of benefits beyond its delicious taste:
- A Simple Process: This recipe is surprisingly simple and straightforward, even for beginners. With clear instructions and helpful tips, you’ll be making delicious jam in no time.
- Great for Beginners: Even if you’ve never made jam before, this recipe will guide you through each step, making it an accessible and enjoyable project for anyone.
- Healthy and Delicious: Homemade jam is a healthier alternative to store-bought varieties, often filled with added sugars and preservatives. This recipe allows you to control the sugar content and use only fresh, wholesome ingredients.
- Versatile Use: This strawberry jam isn’t just for toast! Its versatility extends to a wide range of applications, from topping pancakes and waffles to using it as a filling in cakes, cookies, and even savory dishes. Try pairing it with our mini pumpkin pies for a delightful fall treat.
- Improves Culinary Skills: Making jam is a great way to hone your cooking skills, learning about timing, temperature control, and the process of preserving food. It’s a valuable skill that will serve you well in the kitchen.
- A Fun Family Activity: Making jam can be a fun and engaging activity for the whole family, creating lasting memories and a shared sense of accomplishment. It’s a wonderful way to spend quality time together in the kitchen.
Ingredients and Necessary Utensils for Your Homemade Strawberry Jam Recipe
Before embarking on your jam-making journey, ensure you have all the necessary ingredients and tools at hand. This will streamline the process and help you create perfect homemade strawberry jam.
Ingredients:
- 4 cups (1 pound) ripe strawberries: The star of the show! Choose strawberries that are perfectly ripe, fragrant, and bursting with flavor. Avoid using overripe or damaged strawberries, as they can affect the texture and taste of the jam. Using organic strawberries is a great way to ensure superior quality and eliminate potential pesticide residues.
- 3 cups granulated sugar: Granulated sugar is the classic choice for jam making due to its fine texture and ease of dissolving. Adjust the amount of sugar based on your preference for sweetness and the sweetness of your strawberries. Consider using a sugar substitute if you are watching your sugar intake. The sugar aids in preserving the jam.
- 1/4 cup lemon juice (about 1 large lemon): Lemon juice is crucial for several reasons. It adds a lovely tanginess that balances the sweetness of the strawberries, enhances the flavor profile, and acts as a natural preservative, helping to prevent spoilage and maintain the bright color of the jam.
- 1 (1-inch) piece lemon zest (optional, but adds brightness): Adding lemon zest elevates the jam’s flavor with a bright citrus note. Be sure to zest the lemon before juicing to avoid getting any bitter white pith in your zest. This adds a beautiful aromatic dimension to the jam.
- 1/4 teaspoon butter (optional, helps reduce foaming): A tiny bit of butter helps reduce foaming during the cooking process. This is a helpful tip for achieving a smoother, more appealing jam.
Necessary Utensils:
- Large, heavy-bottomed saucepan: This is essential for even heating and preventing scorching. A heavy-bottomed pan distributes heat more evenly, crucial for achieving the perfect consistency for your jam.
- Wooden spoon or spatula: Use a wooden spoon or spatula for stirring the jam during cooking. Avoid using metal utensils, as they can scratch the pan and potentially react with the jam.
- Measuring cups and spoons: Accurate measurements are essential for achieving the desired consistency and flavor in your jam. Invest in quality measuring tools for optimal results.
- Sterilized jars and lids: You’ll need jars and lids that have been properly sterilized to ensure safe storage of your jam. Sterilizing prevents spoilage and allows for longer shelf life.
- Jar lifter (optional but recommended): A jar lifter makes handling hot jars much safer and easier, preventing burns during the filling process. This is a valuable tool for every home preserver.
- Large bowl: A large bowl is useful for preparing the strawberries and combining ingredients before cooking.
- Plate or saucer: This is for the “wrinkle test” to determine the jam’s setting point. A chilled plate will give you the most accurate results.
- Candy thermometer (optional): For accurate temperature monitoring while cooking the jam. A candy thermometer ensures you achieve the perfect setting point, guaranteeing properly set jam.
- Large pot and rack for water bath canning (optional): If you wish to water bath can your jam for longer shelf life, you’ll need a large pot, a canning rack, and a suitable lid that fits the pot.
Detailed Steps for Making Homemade Strawberry Jam
Now that you have gathered your ingredients and utensils, let’s proceed to the step-by-step guide for making this delicious Homemade Strawberry Jam Recipe. Follow these instructions to perfection for a truly remarkable outcome. Remember, attention to detail is key in preserving fruits!
Step 1: Preparing the Strawberries
- Wash the strawberries thoroughly under cold running water. Remove the green caps (hulls) from the strawberries. A strawberry huller can speed up this process, but a paring knife also works well.
- Slice the strawberries into roughly 1/2-inch pieces. Consistent size will ensure even cooking and prevent some pieces from becoming overcooked while others remain undercooked. A sharp knife makes this task faster and easier.
- If using lemon zest, zest the lemon before juicing. Use a microplane zester or a fine grater to obtain the finest zest possible. Avoid getting any white pith, as it can add a bitter taste to the jam.
Step 2: Combining the Ingredients
- In a large, heavy-bottomed saucepan, combine the sliced strawberries, granulated sugar, lemon juice, lemon zest (if using), and butter (if using). Gently stir to mix all ingredients thoroughly. Ensure the sugar is evenly distributed among the strawberries.
Step 3: Cooking the Jam
- Bring the mixture to a boil over medium-high heat, stirring frequently to prevent sticking. Stirring is crucial to ensure the sugar dissolves properly and prevents burning on the bottom of the pan.
- Once boiling, reduce the heat to medium-low and continue to stir occasionally. The jam will begin to thicken as it simmers. Be patient during this stage; it’s crucial for achieving the perfect texture.
Step 4: Reaching the Setting Point
- Cook the jam for 10-15 minutes, or until it reaches the setting point. The setting point is crucial for achieving a jam that sets properly. There are two ways to test for the setting point:
- The Wrinkle Test: Place a small amount of jam onto a chilled plate or saucer. Let it cool for a minute, then push the jam gently with your finger. If the surface wrinkles slightly, the jam has reached the setting point. This indicates the pectin has set sufficiently.
- Jam Thermometer: The jam should reach 220°F (104°C) on a candy thermometer. This is the most accurate method, ensuring perfect setting every time.
Step 5: Filling the Jars
- While the jam is still hot, carefully ladle it into sterilized jars, leaving about 1/4 inch of headspace at the top. This headspace allows for expansion during cooling and prevents the jars from cracking.
- Wipe the rims of the jars clean with a damp cloth. Any residue on the rim can prevent a proper seal.
- Seal the jars with lids and rings. Screw the rings on tightly, but don’t overtighten.
Step 6: Processing the Jars (Optional)
- For longer shelf life, process the filled jars in a boiling water bath for 10 minutes. This is highly recommended for longer storage. Ensure the jars are fully submerged in boiling water.
- If not processing, allow the jars to cool completely. You should hear a “pop” sound as the jars seal. This indicates a vacuum seal, essential for long-term storage.
Step 7: Cooling and Storing
- Let the jars cool completely. Check the seals to ensure they are properly sealed (the lids should not flex). Properly sealed jars can be stored in a cool, dark pantry for up to a year.
- Unsealed jars should be refrigerated and used within a few weeks. Store them in the refrigerator for best results and to prevent spoilage.
Tips and Variations for Your Homemade Strawberry Jam Recipe
While this recipe is delicious on its own, here are some tips and variations to make it even better or to suit your specific preferences.
- Adjust Sweetness: Reduce the sugar if you prefer a less sweet jam, or increase it if your strawberries are less sweet. Taste the jam towards the end of cooking and adjust accordingly. Consider using honey or maple syrup for a natural sweetener.
- Add Spices: A pinch of cinnamon, cardamom, or even a few drops of vanilla extract can complement the strawberry flavor beautifully. Experiment with different spices to discover your favorite combination.
- Incorporate Other Fruits: Mix in raspberries, blueberries, or blackberries for a more complex and layered flavor profile. The addition of other fruits can add visual appeal and unique taste notes.
- Make it Vegan: Omit the butter, which is purely optional. It has no effect on the flavor or setting of the jam. The recipe is naturally vegan without it.
- Avoid Overcooking: Overcooking can result in a tough and less flavorful jam. Always check for the setting point carefully, and don’t cook the jam longer than necessary.
- Use Proper Sterilization Techniques: Properly sterilizing jars and lids is crucial to prevent spoilage. Follow the instructions carefully to ensure the safety of your homemade jam.
- Proper Storage: Store your sealed jars in a cool, dark place to maintain the quality and flavor of your jam for a longer time.
Nutritional Values and Benefits of Homemade Strawberry Jam
While jam is undeniably a treat, it also offers some nutritional benefits, especially when made with fresh ingredients and minimal added sugar. The nutritional value can vary slightly based on the specific strawberries used and the amount of sugar added.
Approximate Nutritional Information (per tablespoon, without added sugar):
- Calories: Approximately 25-30 calories
- Protein: Trace amounts
- Fat: Negligible
- Carbohydrates: Approximately 6-7 grams
Benefits of Strawberries:
- Rich in Vitamin C: Strawberries are an excellent source of Vitamin C, an antioxidant crucial for immune function and overall health. Vitamin C is also vital for collagen synthesis.
- Antioxidant Properties: Strawberries contain various antioxidants that help protect cells from damage caused by free radicals. These antioxidants contribute to overall well-being.
- Fiber Content: Strawberries provide dietary fiber, which aids in digestion and promotes gut health. Fiber contributes to satiety, keeping you feeling fuller longer.
- Potassium: Strawberries contain potassium, an essential mineral that helps regulate blood pressure and maintain fluid balance in the body.
Note: The nutritional information provided is an approximation and may vary depending on the specific strawberries and the amount of added sugar used. The addition of sugar significantly increases the calorie and carbohydrate content of the jam.
FAQs
How long does homemade strawberry jam last?
What is the best way to sterilize jars for jam making?
Can I use frozen strawberries to make jam?
How do I know if my jam has set properly?
What happens if my jam doesn’t set?
Conclusion
Making your own homemade strawberry jam is a rewarding experience that combines the simple pleasures of cooking with the satisfaction of creating something truly special. This Homemade Strawberry Jam Recipe provides a step-by-step guide to making delicious, fresh, and healthy jam. Remember to adjust the sweetness and experiment with spices or other fruits to customize your jam to your preference. Whether you’re a seasoned preserver or a beginner, this recipe is sure to become a favorite in your kitchen. Share your jam-making experiences in the comments below! Don’t forget to share your creations on Pinterest here! Happy Jamming!
Try out other delicious recipes from our blog like our Pumpkin Fudge or Strawberry Cheesecake Cookies for more delightful treats!
Homemade Strawberry Jam: Easy & Delicious Recipe
Ingredients
Equipment
Method
- Prepare the strawberries: Wash, hull, and slice strawberries into roughly 1/2-inch pieces. Zest the lemon (if using) before juicing.
- Combine ingredients: In a large saucepan, combine strawberries, sugar, lemon juice, lemon zest (if using), butter (if using), and pectin (if using). Stir gently to combine.
- Bring to a boil: Bring the mixture to a rolling boil over medium-high heat, stirring frequently to prevent sticking.
- Reduce heat and simmer: Once boiling, reduce heat to medium-low and continue to stir occasionally. Cook for 10-15 minutes, or until it reaches setting point (see note below).
- Check setting point: A small amount of jam placed on a chilled plate should wrinkle slightly when pushed with a finger. A jam thermometer should read 220°F (104°C).
- Fill jars: Ladle hot jam into sterilized jars, leaving 1/4 inch headspace. Wipe rims clean, seal with lids and rings.
- Process jars (optional): For longer shelf life, process in a boiling water bath for 10 minutes. Cool completely. Refrigerate unprocessed jars.