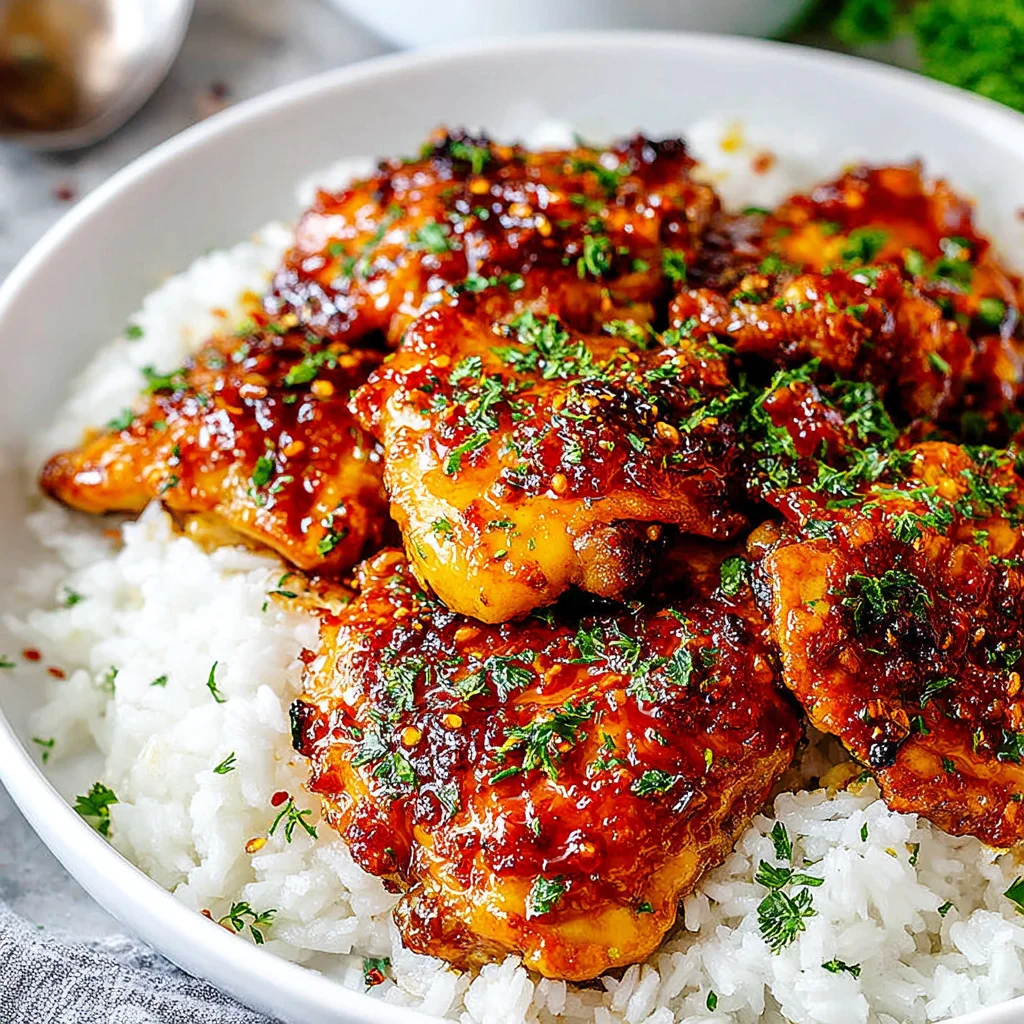
Welcome to the ultimate guide to creating the most addictive, savory-sweet, and perfectly sticky chicken dinner you’ve ever tasted. This recipe for Honey Garlic Chicken Thighs takes a handful of pantry staples and transforms simple boneless, skinless chicken thighs into a weeknight masterpiece. Forget dry chicken breasts the thigh is the star here, guaranteeing a tender, juicy result every single time, enveloped in a glossy, thick glaze that is utterly irresistible. Whether you are seeking a fast weeknight dinner or a crowd-pleasing dish for entertaining, this method provides maximum flavor with minimal fuss.
We will walk you through every critical step, from achieving that perfect golden sear on the chicken to mastering the art of the cornstarch slurry, ensuring your honey garlic sauce transitions from runny liquid to a thick, restaurant-quality glaze. Get ready to ditch the takeout menu, because this dish delivers satisfying, complex flavors in under 30 minutes of active cooking time.
Why You’ll Absolutely Love These Sticky Honey Garlic Chicken Thighs
If there is one category of meal that consistently delivers on the promise of flavor, affordability, and speed, it is the classic Asian-inspired glaze. But this specific recipe for Honey Garlic Chicken Thighs stands out from the competition for several critical reasons, making it a guaranteed favorite in your weekly rotation.
Unbeatable Juiciness and Texture (The Power of the Thigh)
Unlike chicken breasts, which can become dry and stringy if even slightly overcooked, chicken thighs are incredibly forgiving. Their higher fat content ensures they remain moist, tender, and flavorful even when seared hard to develop that delicious caramelized crust. When they meet the sugary, high-heat environment of the honey garlic glaze, they develop a crispy, sticky exterior that provides a wonderful textural contrast to the tender meat within. You get the best of both worlds: crisp skin (or surface area, if boneless/skinless) and melt-in-your-mouth tenderness.
A Perfect Balance of Sweet, Salty, and Savory
The flavor profile is the cornerstone of this dish. It is engineered for maximum satisfaction. The sweetness of the honey provides deep caramelization and body, balanced perfectly by the deep umami saltiness of the soy sauce. But what truly elevates these Honey Garlic Chicken Thighs is the aromatics. We use a generous amount of fresh garlic (6 cloves!) and optional fresh ginger. This combination ensures the dish avoids being cloyingly sweet, instead offering a bright, pungent foundation that cuts through the richness of the chicken. A splash of vinegar at the end adds the necessary acidity to complete the balance, making every bite complex and exciting.
It’s Faster Than Ordering Takeout
Seriously. With a mere 15 minutes of prep time and about 20 minutes in a single pan, this meal is ready to go. The steps are intuitive: sear the chicken, reduce the sauce, and glaze. Even on the busiest weeknights, you can have a gourmet-tasting meal on the table. The minimal cleanup (thanks to that single skillet!) only adds to the appeal, proving that weeknight cooking does not have to mean sacrificing quality for speed. This is a one-pan wonder designed for busy lives.
Why You Should Try This Recipe Now: Mastering the Technique
This recipe isn’t just about mixing ingredients; it’s about mastering two simple techniques that transform the dish from good to genuinely spectacular: the perfect sear and the glossy glaze. By incorporating a quick marination step and utilizing a cornstarch slurry correctly, you unlock the full potential of these flavors. If you’ve struggled with runny sauces or pale chicken in the past, this detailed method is your solution.
Achieving the Golden-Brown Crust (The Maillard Reaction)
The secret to the depth of flavor in these Honey Garlic Chicken Thighs starts before the cooking even begins. Patting the chicken dry is the single most important preparatory step. Moisture on the surface prevents the chicken from searing; instead, it steams. By removing excess moisture, we ensure that when the chicken hits the hot oil, the Maillard reaction the chemical process responsible for that rich, complex, savory flavor and deep brown color can occur instantly. This provides a flavorful base that later mixes with the sauce, creating the ‘fond’ those delicious browned bits that are scraped up into the glaze.
The Magic of the Cornstarch Slurry for a Perfect Glaze
The difference between a sauce and a glossy glaze is often just one simple ingredient: cornstarch. In this recipe, we prepare a cornstarch slurry a mixture of cold water and cornstarch and add it after the sauce has simmered and reduced slightly. This technique allows the glaze to thicken rapidly and dramatically, yielding that characteristic glossy, sticky texture that clings perfectly to the chicken. This texture is not only visually appealing but concentrates the flavor, delivering a powerful punch of honey garlic with every bite. Never add dry cornstarch directly to a hot liquid, as it will clump; the slurry step is mandatory for smoothness.
Ideal for Meal Prep and Versatility
Chicken thighs hold up exceptionally well when reheated, making this an ideal recipe for meal prepping. You can cook a large batch of Honey Garlic Chicken Thighs on a Sunday and enjoy them throughout the week. They pair beautifully with almost any carbohydrate or vegetable. Serve them over classic white rice, alongside some crunchy stir-fried vegetables, or even shredded into a quick Asian-inspired salad. For a comforting side, consider something like this Crockpot Mac and Cheese variation for a delicious flavor mashup. The versatility ensures this recipe will not lead to flavor fatigue.
Essential Ingredients and Utensils for Perfect Honey Garlic Chicken Thighs
The beauty of this dish lies in its simplicity. Most ingredients are likely already in your pantry. However, the quality and preparation of a few key components especially the garlic and the chicken will significantly impact the final result. We will explore the precise measurements and the recommended tools to ensure success.
Detailed Ingredient Breakdown
For the Chicken:
- 2.5 pounds boneless, skinless chicken thighs (about 6 to 8 thighs): Thighs are the superior choice here for juiciness and flavor. Ensure they are boneless and skinless for quick, even cooking and perfect sauce coverage.
- 1 tablespoon olive oil or vegetable oil: Use an oil with a high smoke point for searing. Vegetable, canola, or grapeseed oil are excellent choices, though olive oil works if monitored carefully.
- 1 teaspoon kosher salt: Kosher salt provides a clean, even seasoning. Always season the chicken generously before adding the sauce.
- 1/2 teaspoon freshly ground black pepper: Use freshly ground pepper for the best aroma and flavor contribution.
- 1/4 cup finely chopped fresh parsley or green onions (for garnish, optional): The garnish is not just for looks; it provides a necessary burst of freshness that lifts the heavy, rich sauce. Green onions (scallions) offer a light oniony bite, while parsley is purely refreshing.
For the Honey Garlic Sauce:
The sauce is where the magic happens, combining sweet, salty, acidic, and pungent notes into a syrupy glaze.
- 1/2 cup low-sodium soy sauce: Low sodium is crucial. Since the sauce reduces, using regular soy sauce can result in an overwhelmingly salty glaze. If you only have regular, reduce the amount to 1/3 cup and add 1/4 cup extra water.
- 1/2 cup honey: The primary sweetener and thickener. This caramelizes beautifully under heat, providing the sticky texture.
- 1/4 cup water or chicken broth: Helps loosen the sauce ingredients initially. Broth adds a slight depth of flavor, but water works perfectly well.
- 6 cloves garlic, minced very finely: Do not skimp on the garlic! Freshly minced garlic is non-negotiable for that authentic honey garlic punch. Jarred garlic will not yield the same powerful flavor.
- 1 teaspoon grated fresh ginger (optional, but highly recommended): Ginger introduces a warm, citrusy dimension that prevents the dish from tasting flat. Use a microplane or fine grater for the best results.
- 1 tablespoon apple cider vinegar or rice vinegar: This acid cuts through the sweetness and richness, balancing the overall flavor profile. Rice vinegar is slightly milder, but apple cider vinegar provides a pleasant tang.
- 1 tablespoon cornstarch (or corn flour): The key thickener. We use this to make the slurry that stabilizes the glaze.
Recommended Tools and Utensils for Success (700-900 Word Target)
Having the right kitchen equipment makes the process of creating amazing Honey Garlic Chicken Thighs seamless and enjoyable. Investing in a few key items will ensure you get that perfect sear and a smooth, consistent glaze every time.
The Skillet (Heavy-Bottomed is Best)
The choice of pan is perhaps the most important decision for this recipe. We need a pan that retains heat evenly and can withstand high temperatures for searing.
- Cast Iron Skillet: This is the gold standard. Cast iron heats incredibly evenly and retains that heat, which is vital for achieving a dark, caramelized sear on the chicken thighs without dropping the pan temperature too quickly. Furthermore, the seasoning in a well-maintained cast iron pan contributes slightly to the overall richness.
- Stainless Steel Skillet: An excellent second choice. Stainless steel allows you to easily monitor the color development (browning) and is fantastic for developing ‘fond,’ the browned bits on the bottom of the pan that are scraped up to enrich the final sauce.
- Non-Stick Skillets (Use Caution): While convenient for cleanup, non-stick pans often do not get hot enough to achieve the deep, crispy sear required for maximum flavor development. If using non-stick, ensure you are using a high-quality pan capable of medium-high heat.
Preparation Tools
Precision in prep leads to perfection in plating.
- Sharp Chef’s Knife and Cutting Board: Essential for finely mincing the large quantity of garlic and grating the ginger. Uniform mincing ensures the aromatics cook into the sauce evenly without burning.
- Small Microplane or Fine Grater: Absolutely necessary for grating fresh ginger. Grating provides a burst of fresh flavor that incorporates instantly into the sauce, unlike chopping, which leaves fibrous pieces.
- Whisks (Medium and Small): You will need two whisks. A medium whisk for combining the main sauce ingredients (ensuring the honey dissolves completely) and a smaller whisk for the cornstarch slurry. Using a dedicated small bowl and whisk for the slurry is vital to avoid lumps.
- Measuring Cups and Spoons: While many seasoned cooks can eyeball ingredients, the balance of the honey-garlic glaze is precise. Use accurate measuring tools, especially for the cornstarch and vinegar, to ensure perfect thickness and balance.
- Paper Towels: A huge quantity of paper towels is needed to thoroughly pat the chicken thighs dry. This simple action elevates the sear from mediocre to magnificent.
Cooking and Serving Aids
- Digital Instant-Read Thermometer: The only way to guarantee perfectly cooked, safe, and juicy chicken is to use a thermometer. Chicken thighs are done when they reach 165°F (74°C), though many cooks prefer them closer to 175°F (80°C) for maximum tenderness due to the breakdown of connective tissue.
- Tongs: Essential for safely handling and flipping the chicken in the hot pan and for tossing the finished thighs in the sticky glaze without damaging the surface.
- Small Prep Bowls (for the Slurry): Keep your slurry separate and ready. This is critical you need the cornstarch mixed with cold water before it hits the hot liquid.
By using these ingredients and ensuring you have these tools ready, you are setting yourself up for a flawless execution of the best Honey Garlic Chicken Thighs you will ever make.
Detailed Recipe Steps: Achieving the Perfect Glazed Chicken
Follow these instructions closely to achieve that highly sought-after sticky glaze and juicy chicken. Remember, preparation is key; read through all steps before turning on the heat.
Part 1: Preparing the Chicken and Sauce (The Foundation)
- Prepare the Thighs for Searing:
Thoroughly pat the chicken thighs dry using paper towels. This step is critical for achieving a good sear, so spend time blotting every surface. Season both sides of the dry thighs generously with the kosher salt and black pepper. Set the seasoned chicken aside on a clean plate.
- Mix the Sauce Base:
In a medium bowl, combine the soy sauce (low-sodium recommended), honey, water (or broth), finely minced garlic, grated ginger (if using), and apple cider vinegar. Whisk these ingredients together until the honey has fully dissolved and the mixture is uniform. Ensure you taste it it should be savory, sweet, and pungent.
- Create the Cornstarch Slurry:
This is the thickening agent. In a small separate bowl, whisk the 1 tablespoon of cornstarch with 2 tablespoons of cold water until a smooth, thin paste is formed. This paste, known as a slurry, must be smooth and completely lump-free. Set the slurry aside; it will be used at the very end to create the glossy glaze.
- Marinate (Optional but Highly Recommended):
Pour approximately half of the honey garlic sauce mixture over the seasoned chicken thighs in a large zip-top bag or shallow dish. Toss to coat completely. Allow the chicken to marinate at room temperature for at least 20 minutes to allow the salt and flavors to penetrate the meat slightly, or refrigerate for up to 4 hours. Keep the remaining half of the sauce mixture separate. This remaining sauce will be the final cooking glaze and must not be contaminated by raw chicken.
Part 2: Cooking the Chicken (Achieving the Sear)
- Heat the Pan:
Heat the olive oil or vegetable oil in a large, heavy-bottomed skillet (cast iron or stainless steel works best) over medium-high heat until the oil is shimmering but not smoking. You know the pan is ready when a flick of water evaporates instantly.
- Sear the Chicken:
Carefully place the marinated chicken thighs into the hot pan. Lay them down gently, away from you, to prevent splattering. Ensure they are not overcrowded crowding will reduce the pan temperature and prevent searing (you may need to work in batches). Reserve any remaining marinade from the bag; we will add this for extra flavor later.
- Cook for Color and Internal Temperature Check:
Sear the chicken thighs for 5 to 7 minutes on the first side without moving them until they develop a deep golden brown, slightly caramelized crust. Flip the chicken and reduce the heat slightly to medium. The caramelization creates the rich flavor necessary for the best Honey Garlic Chicken Thighs.
- Finish Cooking:
Continue to cook the chicken on the second side for another 5 to 8 minutes. Use an instant-read thermometer to check the internal temperature, aiming for 165°F (74°C). Once cooked through, remove the chicken from the skillet and transfer it to a plate. Cover loosely with foil to keep warm and allow the juices to redistribute.
Part 3: Finishing the Sauce and Glazing (The Sticky Finale)
- Bring Sauce to a Simmer:
Pour the reserved half of the honey garlic sauce (the fresh sauce that was NOT used for marinating) into the skillet. If you reserved any marinade from step 6, you can add that now too, as it will be boiled vigorously. Bring the sauce to a rolling simmer over medium heat, scraping up any browned bits (the “fond”) from the bottom of the pan using a wooden spoon. These bits are pure flavor! Reduce the heat slightly once simmering.
- Thicken the Glaze:
Whisk the prepared cornstarch slurry one more time to recombine the cornstarch (it settles quickly). Slowly pour the slurry into the simmering sauce. Stir constantly for about 1 to 2 minutes. The sauce will rapidly transition, dramatically thickening into a glossy, sticky glaze. If it is too thick, add a teaspoon of water; if too thin, mix a tiny bit more cornstarch with cold water and add it slowly.
- Glaze the Chicken:
Return the cooked chicken thighs back into the skillet. Turn off the heat or reduce it to very low. Toss the chicken gently in the thickened sauce, turning them several times until they are completely coated and glossy with the rich Honey Garlic Chicken Thighs glaze. This quick toss is just to coat and warm the chicken through, not to continue cooking.
- Serve:
Remove the chicken and sauce from the heat immediately. Garnish generously with fresh chopped parsley or green onions. Serve piping hot over fluffy rice, noodles, or with steamed vegetables like perfectly cooked Roasted Brussels Sprouts and Sweet Potatoes.
Tips, Variations, and Troubleshooting for Honey Garlic Perfection
While the core recipe is straightforward, there are several ways to customize it to fit specific dietary needs or flavor preferences. Knowing how to troubleshoot common issues ensures your Honey Garlic Chicken Thighs turn out perfectly sticky every time.
Ingredient Alternatives and Dietary Variations
Gluten-Free Honey Garlic Chicken Thighs
Making this recipe gluten-free is incredibly easy. The only substitution needed is the soy sauce. Replace the low-sodium soy sauce with an equal amount of Tamari or Coconut Aminos. Tamari is generally the closest flavor match, offering that deep umami. Coconut aminos are slightly sweeter and less salty, so you may need a small pinch more salt.
Spice It Up
If you prefer a little heat with your sweet, there are two great ways to introduce spice:
- During the Marinade: Add 1 teaspoon of chili garlic sauce or sriracha directly into the sauce mixture (step 2).
- During the Glaze: Finish the dish with a pinch of red pepper flakes when you add the slurry. This provides a fleck of color and a slow, lingering heat.
Vegetarian/Vegan Variation (Honey-Free)
This glaze can be adapted for plant-based diets by swapping the chicken for firm tofu, pressed and cubed, or seitan. Crucially, replace the honey with maple syrup or agave nectar. Both provide the necessary sweetness and viscosity for a great glaze, though maple syrup may require slightly more cornstarch to achieve the same stickiness due to its lower sugar content compared to honey.
Pro-Tips to Avoid Common Mistakes
Mistake 1: Runny Sauce
The number one complaint in glaze recipes is a sauce that fails to thicken. The solution lies in the slurry.
- Ensure the water is COLD: Hot water will cook the cornstarch instantly, forming lumps that won’t dissolve.
- Boil the Sauce: The sauce must reach a full boil after the slurry is added for the cornstarch to activate. If it’s just simmering gently, it won’t thicken properly.
Mistake 2: Scorched Garlic and Ginger
Because the sauce contains high amounts of sugar (honey), it can burn easily, especially if the heat is too high or the aromatics are large.
- Mince Finely: Ensure garlic and ginger are minced very finely.
- Monitor Heat During Simmer: Once the sauce is simmering (Step 9), reduce the heat slightly to medium-low while it reduces to prevent the honey from scorching at the pan edges.
Mistake 3: Chicken Sticking to the Pan
If the chicken is sticking badly, it usually means one of two things: the pan wasn’t hot enough initially, or you tried to flip the chicken too soon.
- Be Patient: Let the chicken sear completely. When a good crust forms, it will naturally release from the pan. If you try to lift it too early, it will tear.
Serving Suggestions and Presentation
Presentation matters! To make your Honey Garlic Chicken Thighs truly shine, consider pairing them with complementary textures and colors. A simple bed of fluffy jasmine rice is traditional, soaking up the extra glaze beautifully. Alternatively, try serving them alongside an Asian noodle salad or incorporating them into lettuce wraps for a lighter meal. For inspiration on pairing and meal prepping, check out my meal prep board on Pinterest!
For a sweet contrast after this savory meal, I highly recommend a light, simple dessert, perhaps these delicious No-Bake Peanut Butter Energy Bites.
Nutritional Values and Health Benefits
While this recipe for Honey Garlic Chicken Thighs is known primarily for its decadent flavor, it also offers significant nutritional benefits, especially when compared to processed takeout alternatives. Using quality ingredients ensures you are fueling your body with protein and essential nutrients.
Estimated Nutritional Breakdown (Per Serving, based on 8 thighs/servings)
Please note these are estimates and may vary based on exact ingredient brands and cooking oil used. This recipe provides an excellent source of protein and moderate fat, making it highly satiating.
| Component | Estimated Value (Per Serving) | Benefit/Notes |
| :— | :— | :— |
| Calories | 350 – 400 kcal | Moderate, varies based on honey and oil used. |
| Protein | 30 – 35g | Excellent source, supporting muscle repair and growth. |
| Fat | 15 – 20g | Primarily from the chicken thigh (mostly monounsaturated fats). |
| Carbohydrates | 25 – 30g | Primarily from the honey (natural sugars). |
| Sodium | ~600 – 750mg | Controlled by using low-sodium soy sauce. |
The Benefits of Choosing Chicken Thighs
Chicken thighs are often underrated but offer several health advantages:
- Higher Iron Content: Dark meat, like the thigh, contains more iron than white meat, which is essential for transporting oxygen throughout the body.
- Rich in B Vitamins: Thighs are an excellent source of B vitamins, particularly Niacin (B3) and B12, which play crucial roles in energy metabolism and nerve function.
- Satiety: The slightly higher fat content contributes significantly to making the meal more satisfying and keeps you full longer, helping manage overall calorie intake throughout the day.
Boosting Health with Aromatics
The generous inclusion of fresh garlic and ginger does more than just enhance flavor it provides powerful health compounds:
- Garlic: Contains allicin, a sulfur compound known for its immune-boosting properties and potential benefits for cardiovascular health. Using six fresh cloves ensures you maximize this benefit.
- Ginger: A staple in traditional medicine, ginger is renowned for its anti-inflammatory and anti-nausea effects. The fresh, pungent flavor also aids in digestion.
When served with a large portion of steamed broccoli or brown rice, these Honey Garlic Chicken Thighs become a balanced and nutrient-dense meal.
Frequently Asked Questions (FAQs) about Honey Garlic Chicken Thighs
Here are some of the most common questions people ask when preparing this sticky, delicious dish, complete with schema markup for enhanced search visibility.
Can I use chicken breast instead of chicken thighs for this Honey Garlic Chicken Thighs recipe?
Yes, you can substitute chicken breasts, but adjust the cooking time carefully. Chicken breasts cook faster and are more prone to drying out. Reduce the searing time to about 4 minutes per side and check the internal temperature immediately once it hits 165°F (74°C). The thighs’ higher fat content makes them ideal for this high-heat, sticky glaze.
Why did my honey garlic sauce not thicken into a glossy glaze?
The most common reason for a thin sauce is insufficient heat activation of the cornstarch. Ensure you are using the cornstarch slurry (cornstarch mixed with cold water), and that the sauce reaches a full, rolling boil for at least 60 seconds after the slurry is added. If it’s still too thin, mix a tiny amount more cornstarch with cold water and slowly add it back to the boiling sauce.
How long can I marinate the Honey Garlic Chicken Thighs?
You can marinate the chicken for as little as 20 minutes at room temperature, which is enough time to let the salt tenderize the meat. For a deeper flavor, you can refrigerate them for up to 4 hours. Because the marinade contains acid (vinegar), avoid marinating for much longer than 4 hours, as the texture of the chicken can start to break down and become mushy.
Can I prepare the honey garlic sauce ahead of time?
Absolutely. You can mix the sauce base (soy sauce, honey, aromatics, vinegar, and water) up to a week in advance and store it in an airtight container in the refrigerator. Just remember to keep the cornstarch slurry separate; the slurry should always be mixed right before you intend to thicken the hot sauce.
What is “fond” and why is it important in making the best Honey Garlic Chicken Thighs?
Fond refers to the highly caramelized, flavorful brown bits left stuck to the bottom of the pan after searing the chicken. When you add the reserved sauce and bring it to a simmer, scraping up this fond (a process called deglazing) dissolves those concentrated flavors directly into the glaze, adding an incredible depth and richness that is key to this recipe’s complexity.
Conclusion: Your New Favorite Dinner Solution
If you were looking for a high-impact, low-effort recipe that delivers on its promise of flavor, you have found it in these glorious Honey Garlic Chicken Thighs. This dish is the perfect blend of savory umami and irresistible sweetness, creating a sticky, caramelized glaze that transforms an ordinary cut of chicken into an extraordinary meal. By following the simple yet crucial steps like patting the chicken dry and utilizing the cornstarch slurry correctly you will achieve restaurant-quality results in your own kitchen.
The versatility of this recipe ensures it can be a staple year-round, whether you pair it with simple steamed rice for a quick weeknight dinner or incorporate it into a larger Asian-themed spread. The high protein content and robust flavor profile guarantee a satisfying dinner that everyone, even the pickiest eaters, will ask for again and again.
So, clear your kitchen counter, gather those pantry staples, and get ready to experience the satisfying crunch of that seared exterior and the tender, juicy meat beneath. We hope these Honey Garlic Chicken Thighs become a beloved favorite in your home. Don’t forget to share your success stories and any creative variations in the comments below! If you are looking for another comforting, quick meal idea, try checking out this recipe for Broccoli Cheese Rice Casserole.
Long And Easy To Read Honey Garlic Chicken Thighs
Ingredients
Equipment
Method
- Prepare the Thighs: Thoroughly pat the chicken thighs dry using paper towels. This step is critical for achieving a good sear. Season both sides of the thighs generously with the kosher salt and black pepper. Set aside.
- Mix the Sauce Base: In a medium bowl, combine the soy sauce, honey, water (or broth), minced garlic, grated ginger (if using), and apple cider vinegar. Whisk these ingredients together until the honey has fully dissolved and the mixture is uniform. Reserve this mixture.
- Create the Slurry: In a small separate bowl, whisk the 1 tablespoon of cornstarch with 2 tablespoons of cold water until a smooth, thin paste (known as a slurry) is formed. This will be used later to thicken the sauce. Set the slurry aside.
- Marinate (Optional but Recommended): Pour about half of the honey garlic sauce mixture over the seasoned chicken thighs in a large zip-top bag or shallow dish. Toss to coat completely. Allow the chicken to marinate at room temperature for at least 20 minutes, or refrigerate for up to 4 hours. Keep the remaining half of the sauce mixture separate, as this will be the final cooking sauce.
- Heat the Pan: Heat the olive oil or vegetable oil in a large, heavy-bottomed skillet (cast iron or stainless steel works best) over medium-high heat until the oil is shimmering.
- Sear the Chicken: Carefully place the marinated chicken thighs into the hot pan, ensuring they are not overcrowded (you may need to work in batches). Reserve any remaining marinade from the bag. Sear the chicken thighs for 5 to 7 minutes on the first side until deep golden brown and slightly caramelized.
- Finish Cooking: Flip the chicken and reduce the heat slightly to medium. Continue to cook the chicken on the second side for another 5 to 8 minutes, or until the internal temperature reaches 165°F (74°C). Once cooked, remove the chicken from the skillet and transfer it to a plate. Cover loosely with foil to keep warm.
- Bring Sauce to a Simmer: Pour the reserved half of the honey garlic sauce (the sauce that was not used for marinating) into the skillet. Bring the sauce to a rolling simmer over medium heat, scraping up any browned bits (fond) from the bottom of the pan using a wooden spoon.
- Thicken the Glaze: Whisk the prepared cornstarch slurry one more time to recombine, then slowly pour it into the simmering sauce. Stir constantly for about 1 to 2 minutes. The sauce will rapidly thicken into a glossy, sticky glaze.
- Glaze and Serve: Return the cooked chicken thighs back into the skillet. Toss the chicken gently in the thickened sauce, turning them several times until they are completely coated and glossy with the honey garlic glaze. Remove the chicken and sauce from the heat immediately. Garnish generously with fresh chopped parsley or green onions before serving. Serve hot over rice, noodles, or with steamed vegetables.